
Set up your service menu, hours and staff
Add services with prices, durations and deposits, set who can do each one, your rooms and hours, and your booking rules.
Free forever Not a trial. No card, no contract, unlimited staff. Card payments cost 3.9% + 30¢. Our promise →
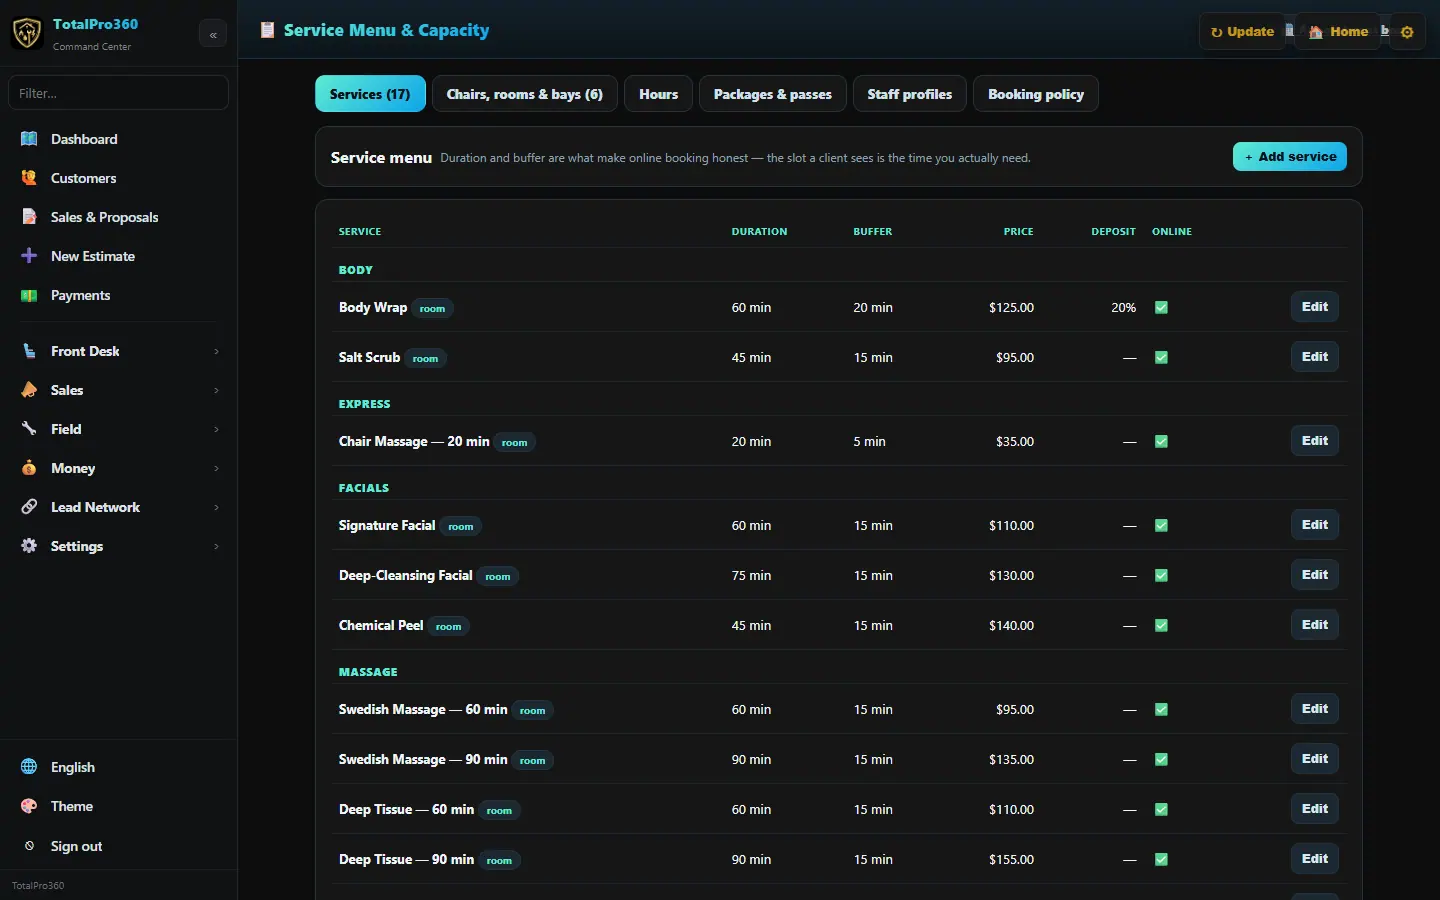
Step 1: Add or edit a service
Open Front Desk → Service Menu. On the Services tab, click + Add service (or Edit). Duration and buffer are what make online booking honest: the slot a client sees is the time you actually need. Set the name, pick a Category, Duration, Buffer / turnover, Price, a deposit (a percent or a flat amount), Who can perform it, and the description clients see on the booking page. Click Save.
Step 2: Delete or restore a service
Click Edit on the service, then Delete this service at the bottom and confirm. It comes off your menu and online booking right away, but past appointments and receipts keep it. Deleted services are hidden; click Show deleted to see them and Restore to bring one back. Equipment deletes and restores the same way. Only an owner or admin can delete; anyone else can untick Bookable online to hide a service from clients.
Step 3: Organize your categories
On the Categories tab, type a name and click + Add category. Rename one in place and click Save name; every service in it follows. Use ↑ and ↓ to set the order your menu and booking page show them in. To delete one that still has services, pick where to move them, then click Move and delete. When you add or edit a service, pick its Category from the list, or choose + New category… to add one. Names are 2 to 40 letters or numbers, and typing one you already have (like “color”) reuses it. Owners, admins and managers can change the list; front desk and techs see it read-only.
Step 4: Set up your equipment
On the Equipment tab, click + Add for each chair, room, table, station or bay, and how many clients it Holds at once.
Then open a service and, under Equipment it needs, pick every kind it uses, for example a Room and a Table for a massage. If it uses more than one of the same kind, like 2 chairs for a couples service, type the number next to it. A booking holds that many of each, so the service is only offered when all of them are free, online and at the front desk. If one is taken, the front desk sees which one instead of double-booking it.
Step 5: Set your hours and booking rules
On Hours, set your business hours and click Save hours. On Booking policy, set Slot spacing, Minimum notice and how many days ahead clients can Book ahead, then click Save policy.
Step 6: Add staff bios and photos
On Staff profiles, write each provider’s Bio — shown to clients, click Upload photo, then Save bio. Clients see these when they pick who to book with.
Only people who do services get a profile. Anyone else on your team (an owner, Front Desk, a manager) is listed under On your team, not bookable. If they take clients too, click Turn on: does services and they get a profile, show on your booking page and can be picked for services. Someone switched off shows Make bookable again.
Step 7: Set what each person does and when they work
On Staff profiles, open Services and working hours under a person. Tick the services they do and click Save services; clients can only book them for those.
Under Working hours, tick the days they work, set their start and end times and click Save hours. Until you do, they follow your opening hours; Use opening hours puts them back. Add holidays or a day off under Time off. The appointment book and your online booking only offer each person inside their own hours.
People can change their own hours too; owners, admins and managers can change anyone’s.
Step 8: Add add-ons and price levels
Open Front Desk → Front Desk Tools. On the Add-ons tab, click + Add-on to create extras like a scalp treatment, with a price and extra minutes. On Staff levels & pay rates, use Add level and Save level prices to charge more for senior providers on the same service.
Step 9: Check your pricing
Open Settings → Service Menu & Pricing. It links every part of your menu (services, add-ons, retail products, packages, memberships, staff pay and commission) and, on Breakeven & Pay, works out your breakeven per day and your rate per booked hour from your overhead, payroll and booked hours. Products & Supplies holds the retail and back-bar products you price with a markup.
Step 10: Set cancellation and no-show fees
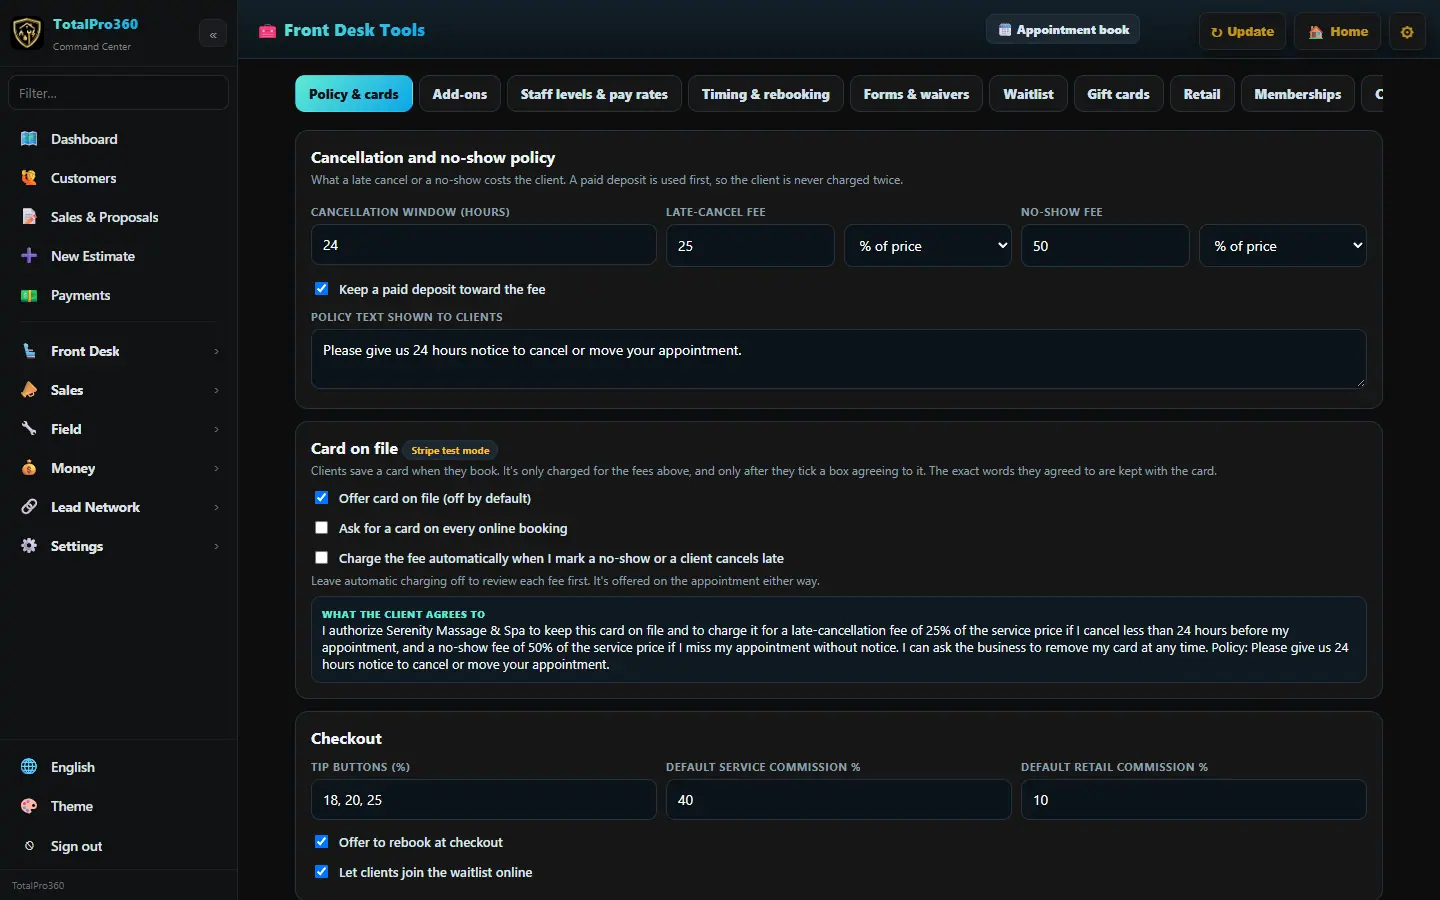
On the Policy & cards tab, set the Cancellation window, the Late-cancel fee and No-show fee (a percent of the price or a flat amount) and the policy text clients see. A paid deposit is used first, so a client is never charged twice. Under Checkout, set your Tip buttons, default service and retail commission, and whether to offer rebooking at checkout. Click Save.
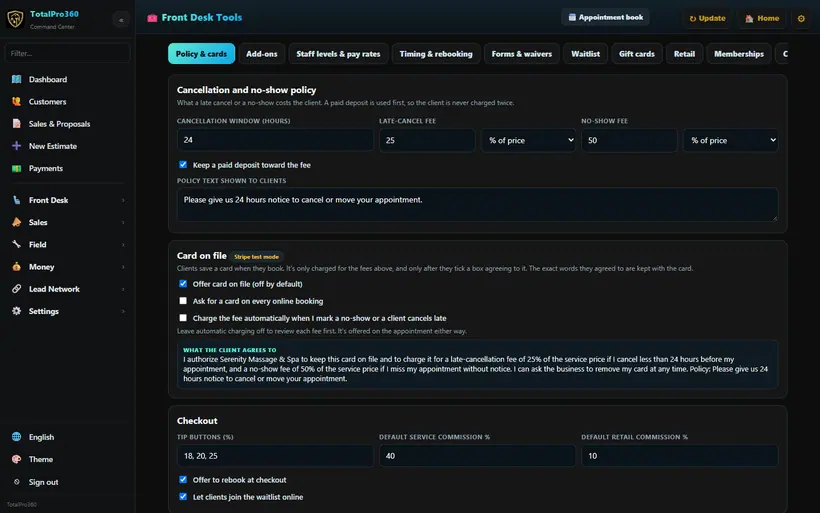
Real screen from the demo account; names and numbers are sample data. Step 11: Compare your price with nearby shops
Open a service and click 🔎 Compare with nearby shops. Look up nearby prices searches the web for that service near your city. Type the prices you find with + Add a shop’s price, and you’ll see the nearby range and average and whether your price is above or below it. Click Save to keep them with the service. We never guess or make up a competitor’s price.
Still stuck? Tell us what you were trying to do and where you got stuck. A screenshot helps.
Your ticks are saved in this browser only. Updated October 2026.
Questions about this
I added a team member but they aren’t in Staff profiles. Why?
Only people who do services have a profile. Front Desk, managers and owners start as not bookable. Find them under On your team, not bookable and click Turn on: does services, or tick Does services when you add them.
If I delete a service, do I lose its history?
No. Past appointments, receipts and reports keep it. Deleting only takes it off your menu and online booking, and you can restore it any time.
Can one service need both a provider and a room?
Yes. Set who can perform it and the room type it needs, and only times when both are free are offered.